Rollback for Salesforce will allow administrators to fully revert their Salesforce environment into a previous version, simultaneously for both data and metadata.
Let’s check out how to perform a Rollback job on the SpinOne platform!
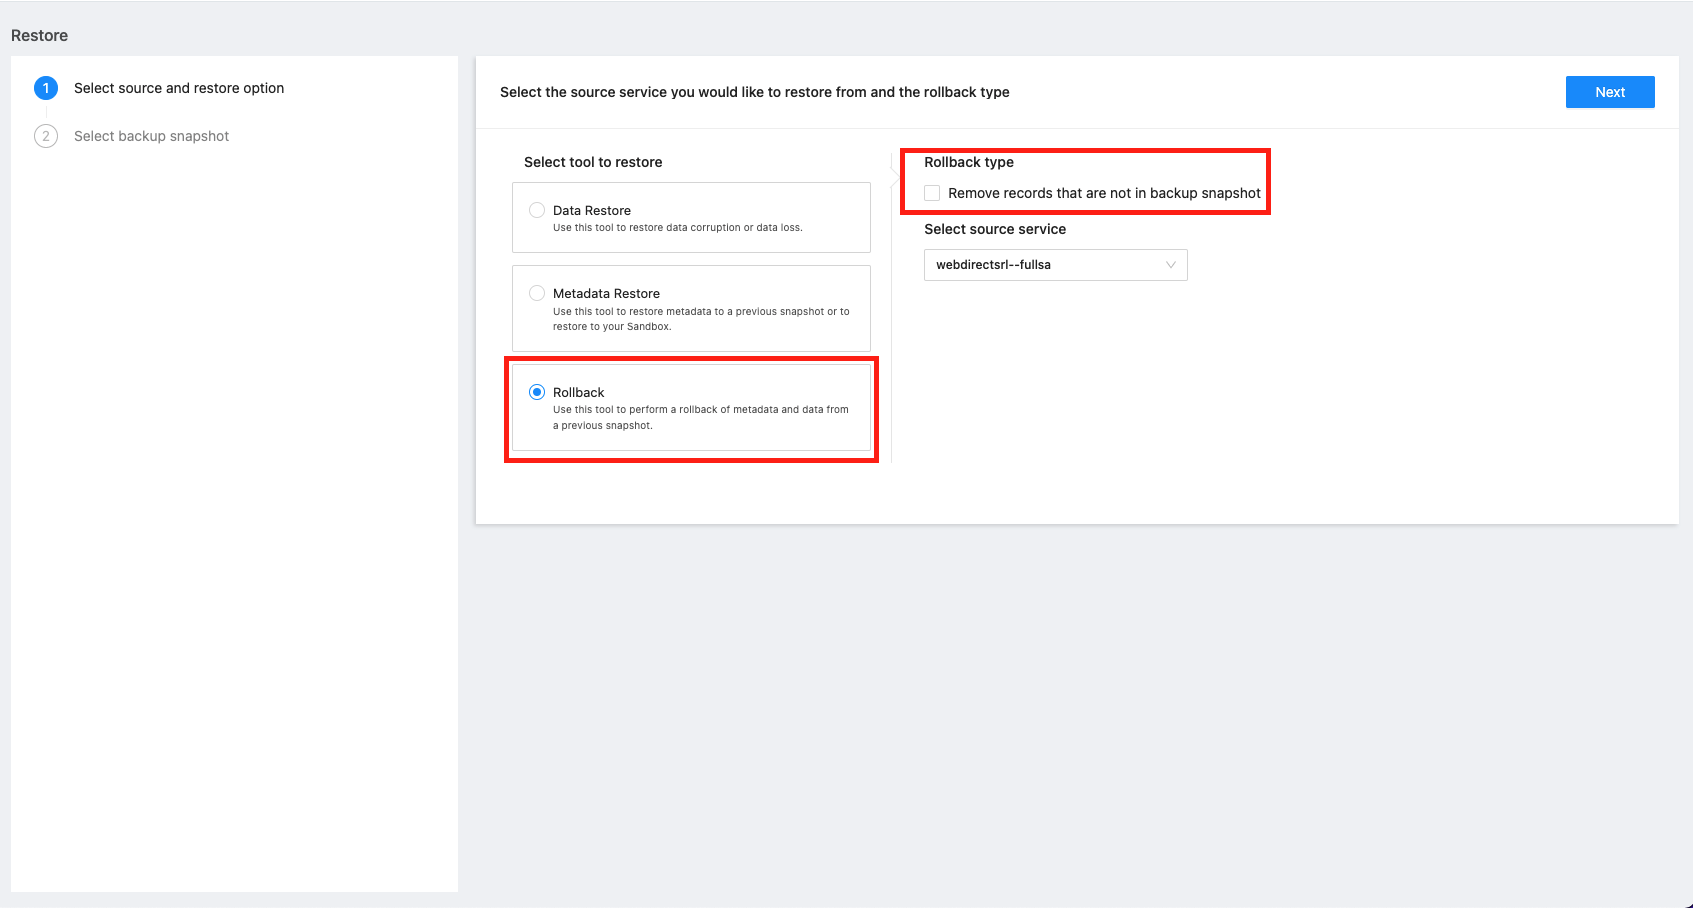
Head to the SpinOne platform for Salesforce and create a new Restore job. Once you create a Restore job, you will now be presented with three options on how to perform the restore:
Data Restore
Metadata Restore
Rollback (Combination of Data and Metadata)
Choose Rollback and continue to select the Rollback type.
If the option to “Remove records that are not in backup snapshot” is not selected, Rollback will only update Removed and Changed records. It will not affect new records in the environment that are not in the previous versions.
If the option is selected, SpinOne will update Removed, Changed and Added records - meaning if a record exists in the new version, but does not exist in the previous version, it will be removed, fully reverting the Salesforce environment to the previous selected snapshot.
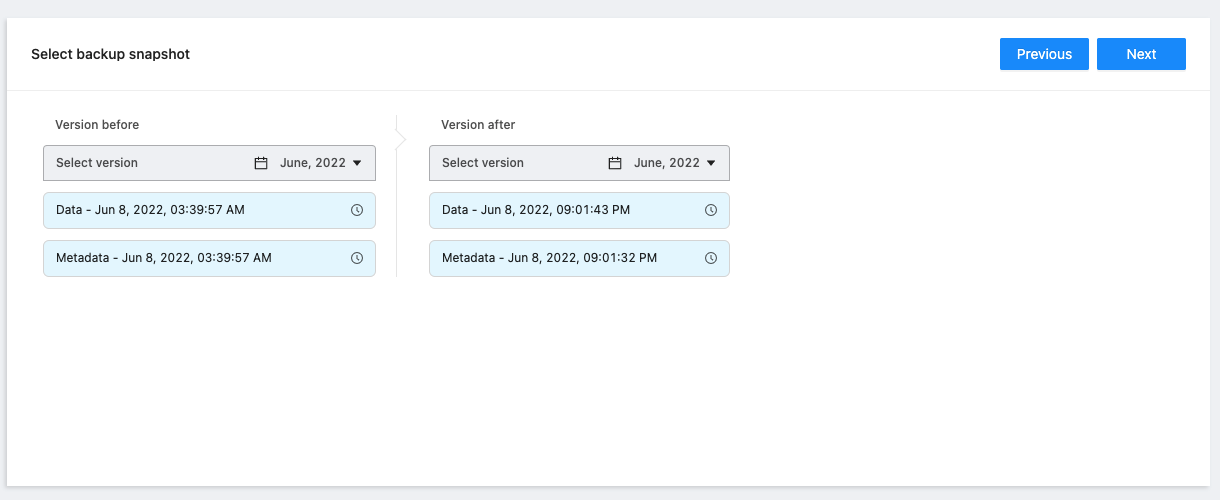
Once you have selected the restore type, click Next to proceed to choosing the before and after versions.
Note: If you would like to perform a rollback between a previous version and your live environment, please launch a backup of Data and Metadata prior to performing the restore.
The versions that you will be able to select from are versions where both Data and Metadata backups have completed within a close timeframe.
Select the versions, and click Next to launch the restore.
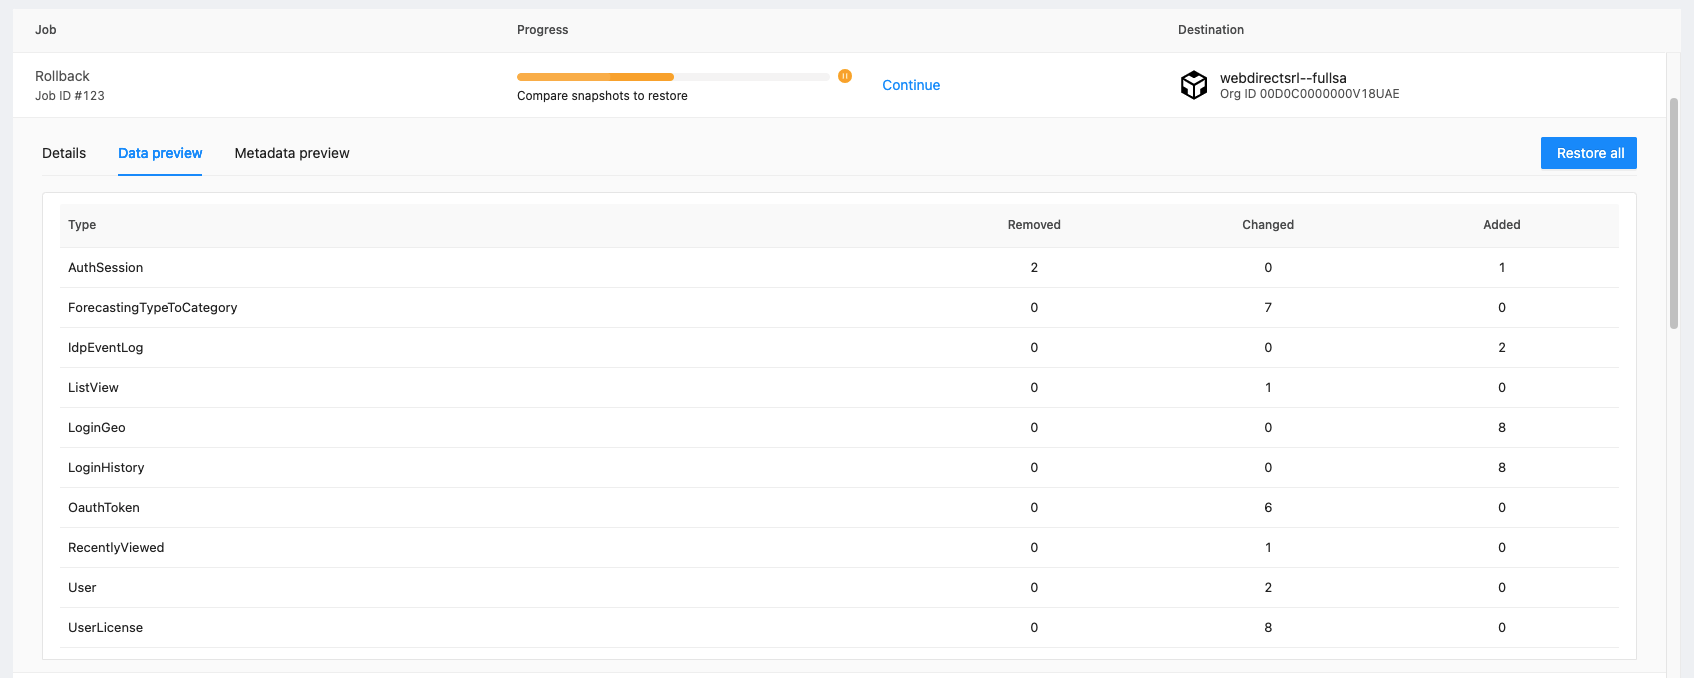
Once the task is launched, SpinOne will first compare both versions and present you with a preview of exactly how many records of each object will be restored. You can view how many records have been Removed, Changed or Added for each object.
Click Restore All to launch the restore task after understanding what will be restored.